Long Post Warning.

This idea started because my homebrew club, QUAFF, was having a contest for Unique IPAs. The winner's beer will even get brewed by a big commercial brewery. There were a good amount of guidelines so that this beer could easily be reproduced on the commercial scale. I think I figured out a a pretty unique beer that still fit all the guidelines.
The other big reason to brew this beer is because my friends are starting to get into the brewing process with me and this is what they like to drink. I have actually never made an IPA before. And once constructing the recipe I figured out that the hops in this batch are equal to what I normally use in 6 months.
Let me take you through our brainstorming process. How do we make a beer that is different but still has all the great qualities that make an IPA great? These were my requirements:
- Big Hop Aroma
- Big Hop Flavor
- Dry Taste
- Light and Crisp Mouthfeel
 Yeast:
I wanted to keep the yeast profile very clean and that was a requirement for brewing on the commercial scale. So by checking this part off the list it narrowed down the choices.
Malt:
This was an area that we could really get creative. The big focus in an IPA is to let the hop flavor shine through so we can't get too bold. The malt should really be a background flavor in this style in my opinion. So we started looking through our possibilities for strange malts to use in an IPA. And my friends were very excited about Smoked Malt. I really wasn't sure how well it would work, but it is worth a try. That meant time for experimenting. So during a brew session with a few friends we did some tasting. I bought 2 oz of 3 different kinds of Smoked malts. I poured in 170 degree water into coffee cups and let the malts steep, then put them in the fridge to get down to beer temperature. Then we used Titan IPA as our test beer.
Peat Smoked Malt - Very strong rich smoke flavor, need extremely small amounts, very phenolic
Rauch Malt - Also peat smoked, but to a much less degree, also rich and high in phenols
Cherry-wood Smoked Malt - the lowest of the 3 on intensity of smoke, also contributes more wood or fruit notes (not cherry though), more complex
We started with very low doses of each "smoke tea" until we had a level we thought would work. My original intention of the tasting was to figure out the amount of malt needed and then scale it to my recipe. I decided against this since the "smoke tea" method seemed to work pretty well and would guarantee that I didn't end up with 5 gals of undrinkable beer.
Another malt addition that I really like is Honey Malt. We added a decent amount of this because when we were doing the "smoke tea" test some of the malt converted so there was some sweetness in the smell that I really liked.
Hops:
First, I had to make the choice between American, English or Noble hops. During our taste test we liked the combo of the citrus hops with the woodsy, fruity smoke. In hindsight, we should have tasted the smoke in several different IPAs. I am also not an expert in hops and especially the high alpha hops used in IPAs. So I got myself educated on cohumulone levels and hop acid levels. Basically, the lower the ratio of cohumulone to alpha acid will give you a less harsh bitterness. (The thinking behind this is the amount of cohumulone in you beer will determine harshness (less is better), so if you can use less hops by using a high alpha acid hop then the total cohumulone amount will be less. See below for some great charts I found online.

Next, the amount of hop oil will give you more hop aroma and flavor. The final consideration is the flavor profile of the hops. Since we decided on American hops this narrowed down our options. We could choose from citrus, piney, dank, apricot. Our idea started to come together as we started to think of the environment that this beer would be consumed. We were aiming for a beer that would be perfect for a summer BBQ. We already have the smoke from the BBQ, now would be a good time to add citrus and apricot (Thinking marinade).
Adjuncts:
 To really make this a BBQ beer we are adding some honey. I thought that this would make sure it dried out. Plus I was trying to play off Honey-BBQ sauce.
Recipe: Cherry-wood Smoked IPA
O.G.-1.067 F.G.-1.012 IBU-55 Size -5.5 gal
SRM-6 ABV-7.2%
Grain Bill (76% Efficiency):
9.5 lb 2-row (81%)
8 oz Honey Malt (4%)
8 oz Flaked Barley (4%)
4 oz Acid Malt (2%)
1 lb Cherry-wood Smoked Malt - Added after fermentation (1 lb in .25 gal mashed at 150, boiled, added to taste (6 oz for 2.5 gals - this amounts to only 3 oz of malt per 5 gals)
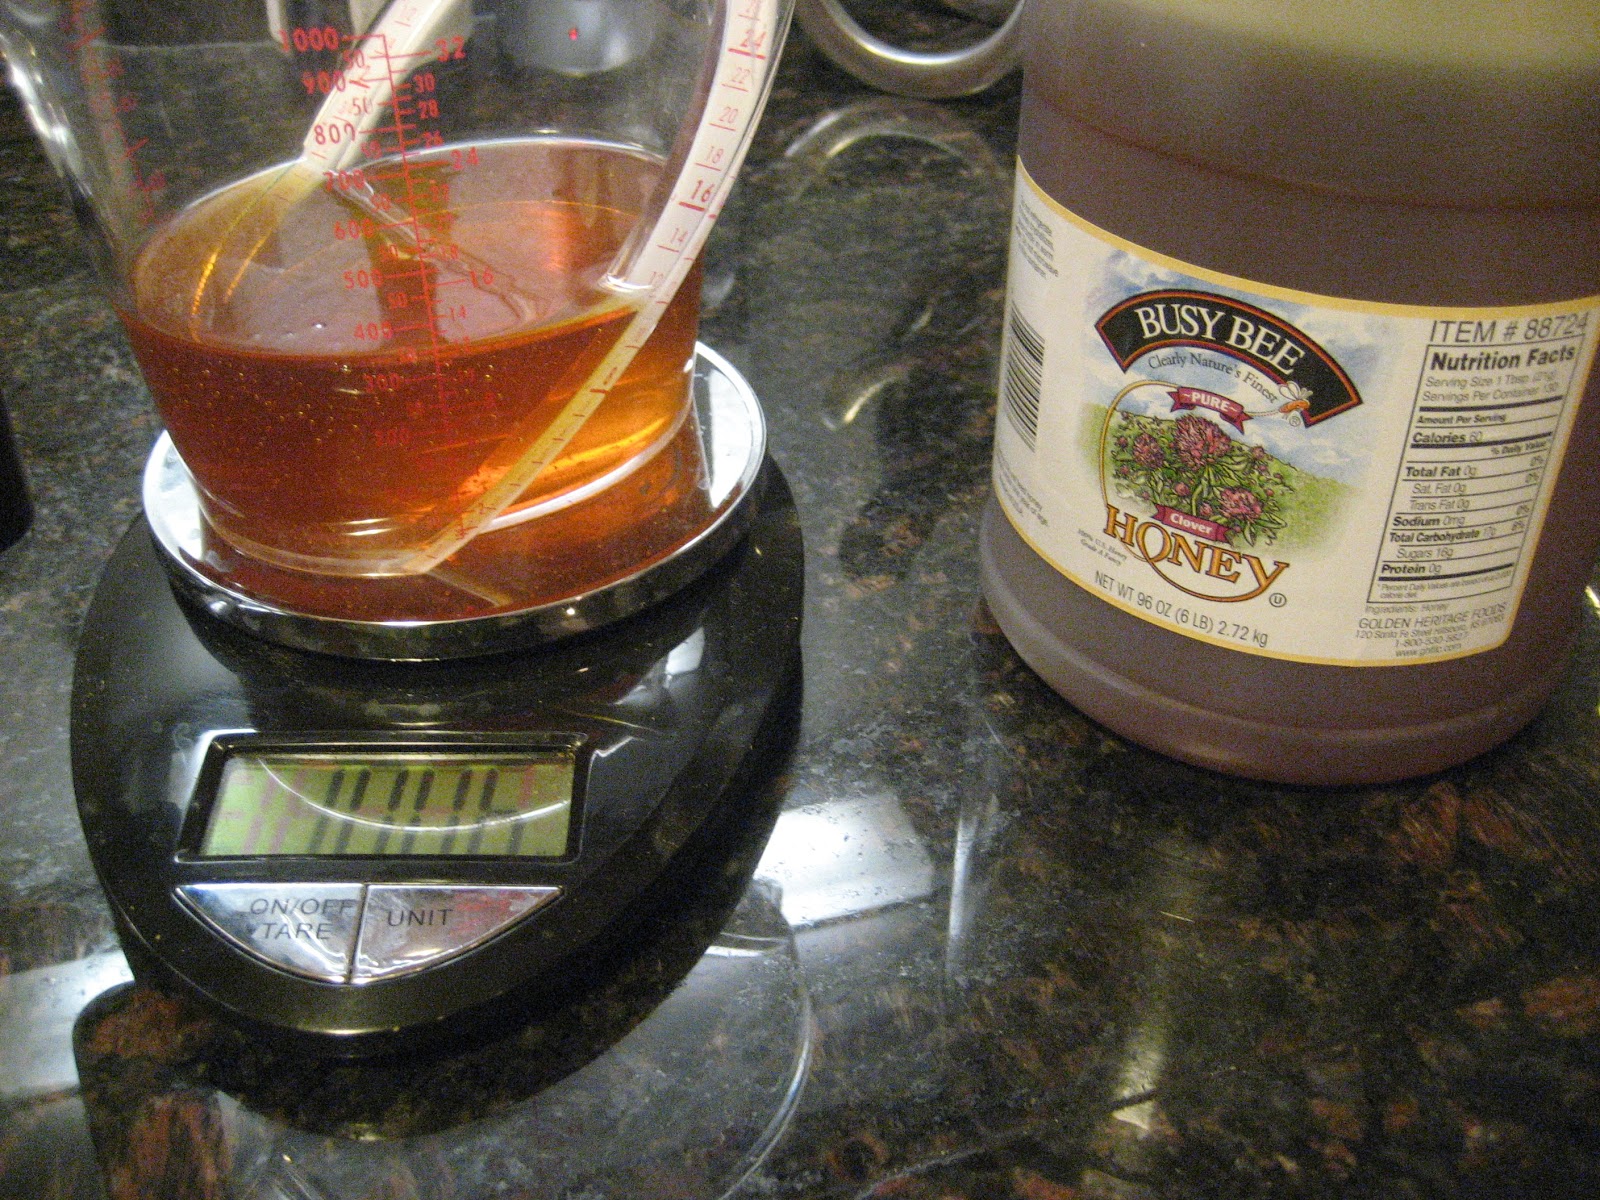
1 lb Honey (9%)
To really make this a BBQ beer we are adding some honey. I thought that this would make sure it dried out. Plus I was trying to play off Honey-BBQ sauce.
Recipe: Cherry-wood Smoked IPA
O.G.-1.067 F.G.-1.012 IBU-55 Size -5.5 gal
SRM-6 ABV-7.2%
Grain Bill (76% Efficiency):
9.5 lb 2-row (81%)
8 oz Honey Malt (4%)
8 oz Flaked Barley (4%)
4 oz Acid Malt (2%)
1 lb Cherry-wood Smoked Malt - Added after fermentation (1 lb in .25 gal mashed at 150, boiled, added to taste (6 oz for 2.5 gals - this amounts to only 3 oz of malt per 5 gals)
1 lb Honey (9%) - Added at Day 6
Hops:
1 oz Amarillo, 9.5%, pellet, First Wort Hopping, 17.4 IBU
.5 oz Columbus, 14%, pellet, 30 min 19.1 IBU
.5 oz Columbus, 14%, pellet, 15 min 9.1 IBU
1 oz Centennial, 10.5%, pellet, 5 min 9.5 IBU
1 oz Amarillo, 9.5%, pellet, 0 min
.5 oz Columbus, 14%, pellet, Dry Hop - Added after Fermentation Day 10
.5 oz Centennial, 10.5%, Dry Hop - Added after Fermentation Day 10
.5 oz Amarillo, 9.5%, Dry Hop - Added after Fermentation Day 10
.5 oz Columbus, 14%, pellet, Dry Hop - Added after Fermentation Day 17
.5 oz Centennial, 10.5%, Dry Hop - Added after Fermentation Day 17
.5 oz Amarillo, 9.5%, Dry Hop - Added after Fermentation Day 17
Yeast:
200mL of yeast slurry of WLP028 Scottish Edinburgh yeast
Brew Day:
Brewed: 2/20/11
Kegged: 3/1/11
Water:
San Diego (Alvarado) Tap Water
1 campden tablet for 5 gal.
Mash Details:
H2O/Grain Ratio: 1.2 qt/lb
Mash Volume: 3 gal
 Sacc Rest. Temp/Time: 148F @ 60min
Strike Temp: 161F
Sparge Volume: 5 gal
Sparge Temp/Time: 170F
Boil Details:
Boil Volume: 6.25 gal
Boil Time: 60min
Post Boil Volume: 5 gal
Ferment Details:
O.G.: 1.062 (no sugar)
Ferment Temp: 65-67F
Primary Length: 10 days
Sacc Rest. Temp/Time: 148F @ 60min
Strike Temp: 161F
Sparge Volume: 5 gal
Sparge Temp/Time: 170F
Boil Details:
Boil Volume: 6.25 gal
Boil Time: 60min
Post Boil Volume: 5 gal
Ferment Details:
O.G.: 1.062 (no sugar)
Ferment Temp: 65-67F
Primary Length: 10 days
Yes, this post keeps going. So as stated before this beer was brewed to be shared. The plan was to enter this single beer in about 4 different competitions (All were contests where your beer would have been brewed by a commercial brewery for the AHA Conference). And these competitions required a lot of beer.
My plans were just that plans because of travel I was only able to enter this beer into 1 contest, the AHA Rally at Stone. This is one of the coolest events I have ever been to. They have over 40 homebrewers and most people bring their stranger beers. I got some good feedback on this beer and I'll post them in the Tasting Notes.
Next time:
- I tried to keep the IBUs down for this beer because I was afraid that the smoke would contribute a bit of a drying taste. Next time I think I will bump up the IBUs 10 - 15 because this turned out more pale ale bitter.
- Now that I know the amount of smoke malt needed (3-4 oz per 5 gals for a subtle flavor) I will add the malt to the mash. The reason for this is that I don't want any smoke aroma, only taste. If I add in the mash then the aroma should be blown off in the fermentor.
- I need to dry-hop with whole hops or use a different method with pellets. I really did not get a very good hop aroma.
And now a of the
Brew Day Video by Dan Olson at DanOVideo.com. I have become the San Diego Gypsy Brewer.
Jeff Crane's Smoked IPA from
Dan Olson on
Vimeo.


 I decided to try a new souring method that I read about in Zymurgy March/April 2011 issue. It is a very simple process and I totally agree with the logic behind it. It is similar to how I did my first Gose, but it involves making a smaller portion of wort and waiting for the bad organisms to be killed by the lowering pH and alcohol.
 As suggested in the article, I used honey for my starter. I did a 12 oz starter (~.1 gal) so I added 1.5 oz (~.1 lb) of honey (40pts/1lb/gal) to get a 1.040 starter. I try to keep my math as simple as possible and for a starter the gravity does not need to be perfect. I boiled the 12 oz of water for a few minutes, poured into the glass container, added the honey and swirled the bottle. I covered the starter with foil and let it cool down to 100F or body temperature. I then pitched in a "handfull" of grain. I purged the jar with CO2 (lacto does not need O2 so to limit growth of other organisms it is good to have a anaerobic environment) and then placed it in the Crockpot on the "Warm" setting (~115F). The article says about 3 days, I was right around there. Basically, you just want to make sure that by the time you use the sour starter that Lactobacillus is the dominant organism and most of the Enterobacteria, and Acetobacter have been destroyed by the low pH.
 SRM-5 ABV-~4% Batch Size - 2 gals
 .1 oz US Goldings, 4.9%, pellet, 60 min 7 IBU
 Mash Details:
 Boil Details:
 I decided to measure the pH of the starter. It actually looks like its under 3 which would be very low. These strips are not really the right ones to use, but they are what I had on hand. The wort from the main batch looks to be in the 4 range. This seems low but it does have a .5 lb of acidic cranberries already added. I was surprised that the color wasn't more pink. We'll see what it looks like after fermentation and carbonation.