
 HARD WORK WARNING: Project took way more time & effort than planned. I also did a ton of research so I hope someone else can benefit.
After brewing for years, I finally have the opportunity to serve my beer through a tap. I was previously limited to using 2.5 gal kegs and a picnic tap on a shelf in our fridge when we lived in the Downtown condo. With the new house, I have space in the garage, which means it is time to build myself a kegerator (or in this case a keezer).
Freezer:
The first thing to decide was what size or how many taps do I want (and what will the wife let me get away with). I figured about 4 taps would give me a good amount of variety and shouldn't take up too much space. Also fortunately 7 cu ft freezers are pretty common and most fit 4 corny kegs. So I started price shopping and my timing was right. It was right around Black Friday and Home Depot was having a super sale on the GE 7.0 cu. ft. Chest Freezer Model # FCM7SUWW for $169 shipped. During my initial research on Homebrewtalk.com I saw this model could hold 4 corny kegs (ball-lock only).
Design:
My next decision was to figure out what I wanted it to look like, so back to Homebrewtalk.com. And 450 pages later I had a pretty good idea. I was going to go the "simple" route of building a wood collar for your taps to go through. The first major choice was to attach the collar to the lid or attach it to the freezer. I decided to attach mine to the lid and here are the reasons:
Pros: Taps and lines lift out of your way when adding new kegs - don't need to worry about bumping shanks and easy to slide kegs in, Lower height to lift kegs into freezer.
Cons: Lid can be heavy, must remove rubber seal

Collar:
 Then I needed to decide what I wanted the collar to look like. The easy way is to use 2x4s or some people who want to add kegs on the compressor hump use 2x8s to accommodate for the added height. Well, I decided to be unique and add a lot of extra work. I had an idea to make the collar from used wine barrel staves. (I debated also using old weathered wood to give me the farmhouse rustic look, but that would have been too easy.)
Now that I decided on wine barrel staves I had to source them. I was having a hard time finding used barrels at the time in San Diego. If I was drive up to the Central Coast there are a few options. I did however find a local company, Barelly Made It, that builds furniture from used barrels. A quick email to Gustaf Rooth and I was headed over to his workshop to pick out some staves and a barrel head.
The next big choice was how to fabricate a rectangular collar from curved staves. I had 3 ideas:
- Straighten the staves by wetting them and using large weights. After watching a bunch of youtube videos I think it might have been outside my ability. (I still may try at some point)
- Fill behind the curved sections with cut wood so that the back is flat and the pieces can be attached to one another. The curvature is pretty big and would require 3 -4" in thickness, which would look strange
- Use the straight sections of the staves. Along the 36-38" oak stave length, 9" on each end are pretty straight and almost all the curvature is in the middle section. There is still some curve in the "straight" 10" pieces, but if they are cut into 4.5" pieces then that is reduced.
So I ended up going with ~4.5" pieces and therefore would need 18 pcs (2 rows of 9) to reach across the front. The next issue is the bevel on the stave, but this was fixed by flipping the pieces opposite to one another or alternating the wine and oak faces. All the pieces were cut to length with 45 degree ends.
The two alternating pieces were glued and clamped. Then the two vertical pieces were glued and clamped to another set

 Then the individual sets were glued, clamped and tightened together with a tie down strap.
After this was together the edges were cleaned up with a table saw. And all the joint interfaces were sanded to help them blend together better. I then drilled the tap holes with a 7/8" bit (use a pilot hole or drill press to get a level hole - I did a pour job). I used a wood rasp to clean the holes and checked the fit before gluing it all together.

For the sides, I decided to make them easy by using the barrel head and just ripping 2 pieces to the correct height on the table saw. Plus it made it look more like a barrel. For the back I just used a scrap piece of pine that was ripped to the proper height. This won't be seen so it doesn't matter.
 Next was to glue all the pieces together to form the collar, this was done again with wood glue and my tie downs. I used a couple pockets screws on the back panel since it didn't have a mitered cut and I wanted to hid the back piece.
I cut the factory seal with a razor blade all the way around the lid. This was pretty easy to do and made it easy to re-use the seal.

Per Gustaf, I just used natural Bees Wax to protect and finish the wood. Then I used liquid nails to attach the collar onto the lid and clamped in place over night.

I used silicon caulking to attach the factory seal and closed the lid. I added some weight and left it to cure overnight. All that was left was to screw the lid back into the hinges with wood screws.

Temperature Control:
I had originally bought Elitech 110V All-Purpose Temperature Controller+ Sensor 2 Relay Output Thermostat Stc-1000 to use for my temperature control. And then I found this thread on homebrewtalk about tweaking the freezer's internal thermostat . And in Post #75 it shows it working on my GE 7 cu ft freezer. I had to try this and over the course of a week and the screw turned in all the way it worked. The bottom section is around 38 degrees and the top is around 40 degrees with +/- a degree. This is a bit colder than I prefer, but I'm fine with it since it makes my job much easier.
Tubing, Taps and Misc Parts:
The cheapest way is to wait until the deals are going, that is if you can wait till November each year. I got my bigger stuff during those sales at the places below. Below is almost everything you need for a 4 tap (+ 1 inside tap) keezer (I had a few things like disconnects, a regulator and CO2 tank).
Adventures in Homebrewing had great Black Friday Deals and I got the following:
Perlick Stainless Steel 525ss Perl Faucet
4 1/8" Shank for Faucet


Kegconnection also does a huge Black Friday Sale and in addition has the best pricing year around (this was compared to my local Beverage Factory and a few other big online shops)
I got a 5 way manifold, but it appears they are different now (and Amazon has it too)
Then the rest of the hoses, disconnects and tools.

I'm not going to go into much depth here because it is somewhat basic, but if you have questions feel free to ask in the comments
Tap Handles:
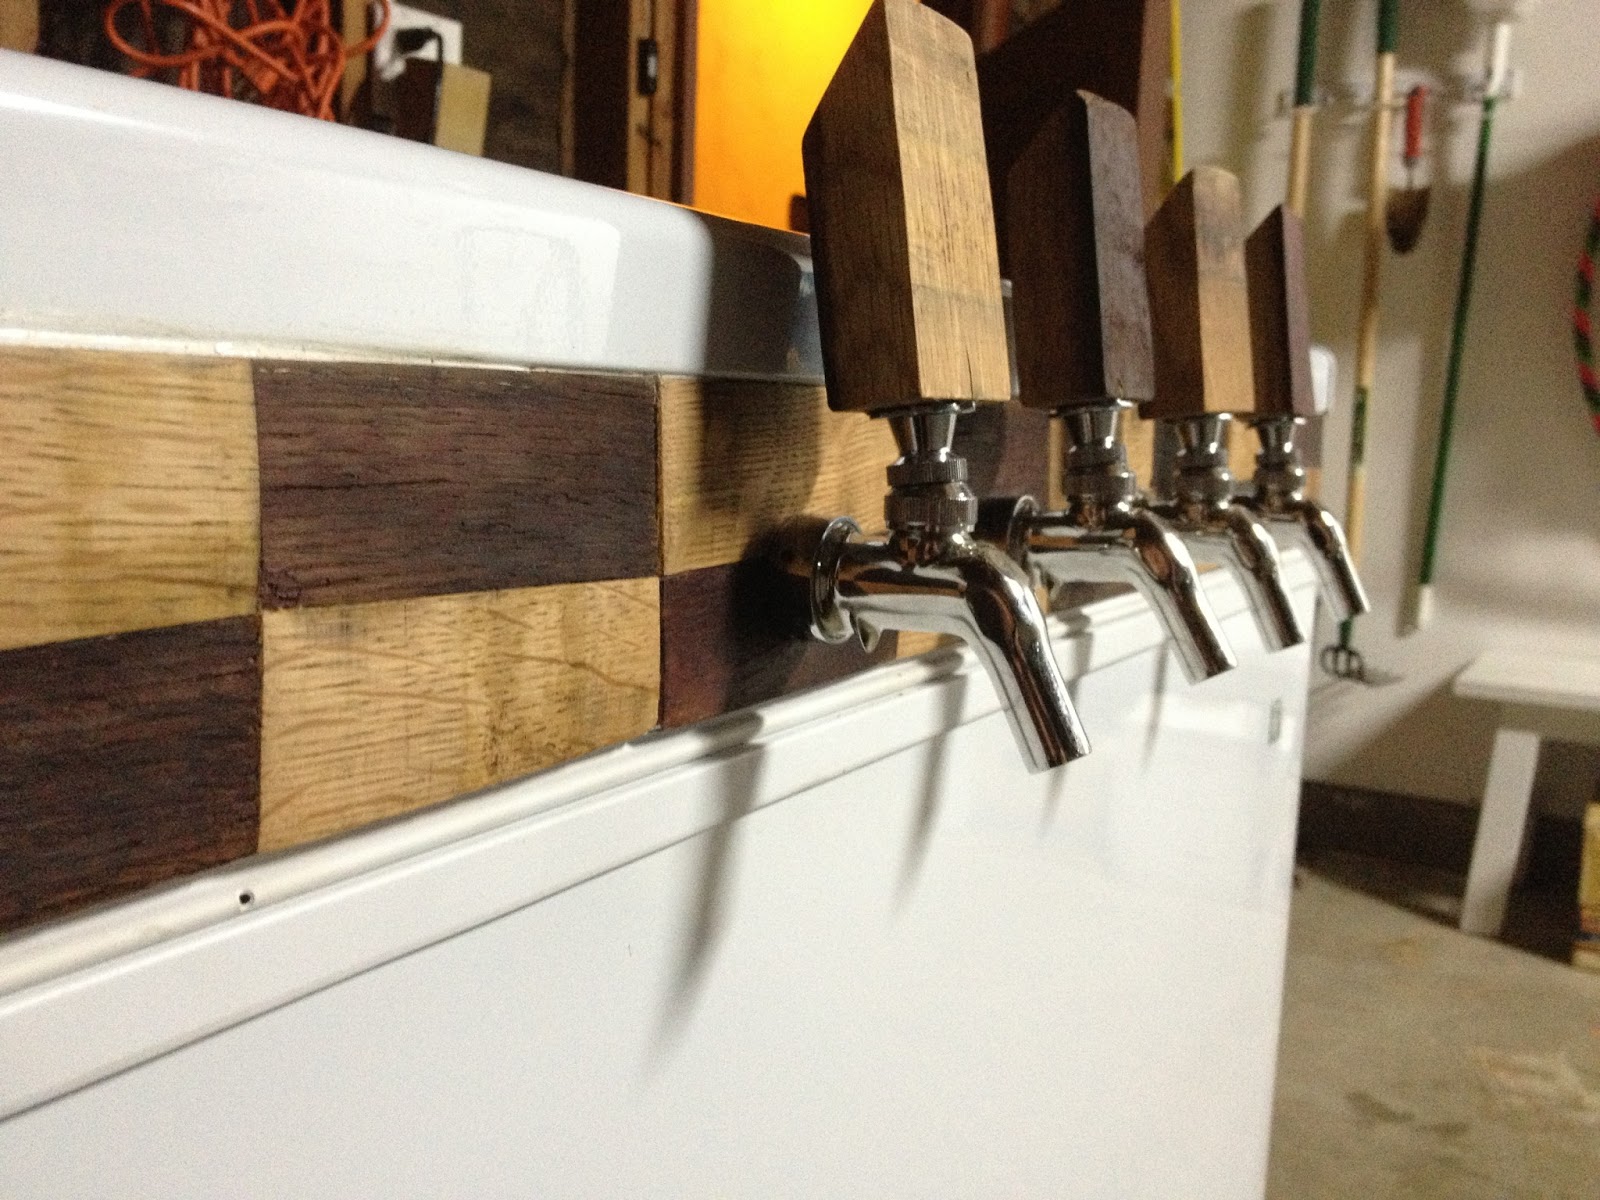
I couldn't really decide on what I want, but in the mean time I used some scrap pieces of the oak staves. I picked up some 3/8-16 x 7/16 Tee Nuts at Home Depot because it was convenient. I made a larger than needed hole and hammered them in, but then decided to epoxy them to make it more solid. You can also use the proper brass tap handle inserts. Mine are basic until I get more creative and try to weld some old vintage bike parts together to make new ones.

It is pretty nice to have beer on draft so I can have half pints with dinner or get creative and do some blending right at the taps.

Tap Handles:
I couldn't really decide on what I want, but in the mean time I used some scrap pieces of the oak staves. I picked up some 3/8-16 x 7/16 Tee Nuts at Home Depot because it was convenient. I made a larger than needed hole and hammered them in, but then decided to epoxy them to make it more solid. You can also use the proper brass tap handle inserts. Mine are basic until I get more creative and try to weld some old vintage bike parts together to make new ones.

It is pretty nice to have beer on draft so I can have half pints with dinner or get creative and do some blending right at the taps.


